
Installing access floor systems in an existing commercial building is a different project from installing them in new construction. The slab is already there. The ceiling height is set. Other trades have already run conduit, ductwork, and structural elements through the space. The floor has to work around all of it. Planning needs to account for constraints that don't exist on a blank floor plate.
That complexity is manageable, but it requires a structured approach. This guide covers the key planning and installation steps for access floor systems in retrofit and conversion projects, from site assessment through post-installation validation.
What Makes Existing Buildings Different for Access Floor Systems
New construction gives installers full control over the sequence. Concrete goes down, pedestals go in, tiles follow, and everything above coordinates to the finished floor height. In an existing building, the sequence runs in reverse. You're working within fixed limits on all sides, and each one creates a constraint.
Ceiling height is the most common factor. Every inch of pedestal height consumed by the floor system is an inch removed from overhead clearance. In buildings with standard commercial ceilings of 9 to 10 feet, a full-height system with 12 to 18 inches of plenum depth may not be viable. Low-profile systems, with pedestals as short as 2 to 4 inches, exist for exactly these situations.
Existing utilities are the second factor. Conduit, water lines, and structural columns all affect cable routing and pedestal placement. A site survey before installation catches every conflict early. That's where they're cheap to resolve. Missing a buried conduit or a structural tie-down can mean pulling up tiles that were just set, reboring pedestals, and losing a full day of crew time on a project that already has a tight commissioning date.
Structural load is the third. Slab ratings in commercial buildings vary widely. The combined weight of the floor system, cables, cooling equipment, and server hardware has to stay within what the slab can carry. Older converted buildings may need an engineering review before installation starts.
Site Assessment: The Step That Shapes Everything Else
A site assessment for access floor systems in an existing building covers four areas: slab condition, ceiling height, utility mapping, and load analysis.
Slab condition matters because pedestals anchor directly to the concrete. Cracks, spalling, or contamination from prior occupancy can affect adhesion and load transfer. Fixing these before installation costs far less than dealing with pedestal failures after tiles and equipment are in place.
Ceiling height determines which system fits. After accounting for pedestal height, tile thickness, and equipment clearance requirements, the remaining overhead space has to meet fire code, HVAC function, and access standards. Work these numbers out before a system is selected.
Utility mapping identifies every conflict between existing infrastructure and the planned pedestal grid. Teams that skip this step almost always pay for it later. A conflict found during survey takes minutes to resolve. The same conflict found mid-installation can set a project back days.
Load analysis confirms slab capacity against the planned system. SET3's subfloor installation services include a full load assessment on every retrofit project, verifying that tile ratings, pedestal ratings, and slab capacity all line up before work begins.
Choosing the Right System for the Space
Access floor systems come in several configurations. The right choice depends on what the site assessment reveals.
Low profile systems work in height-constrained environments. They give up plenum depth, which limits airflow capacity, but they bring raised floor function to spaces where a standard system won't fit. For lower-density deployments, command centers, and edge sites, this trade-off is often acceptable.
Standard height systems, with pedestals from 6 to 18 inches, suit spaces where ceiling height allows and the facility needs plenum volume for cable routing and airflow. These systems give more flexibility for future density increases and cable additions. SET3 sources standard height ASP systems on the same 8 to 12 week lead time as low profile products.
Specialty systems for pharmaceutical cleanrooms require non-ferrous aluminum tiles to prevent outgassing. Tile material selection is a compliance requirement in these environments, not a preference. SET3 supplies and installs ASP aluminum systems with the same lead time advantage that applies across the full product line.
Surface finish matters in retrofit projects. High-Pressure Laminate is the common enterprise choice. Anti-static vinyl such as GERFLOR is faster to source and offers stronger ESD properties for command centers and environments where static control drives the decision. Understanding which finish suits the space is worth settling before procurement, not after delivery.
Installation Sequence in an Existing Building
The installation sequence for access floor systems in a retrofit follows a specific order. Reordering steps creates problems that are costly to fix.
Start with slab prep. The crew cleans the concrete, repairs cracks, and levels any surface variations. Contamination from prior occupancy, including oil, adhesive residue, or chemical deposits, comes off before any anchor goes down.
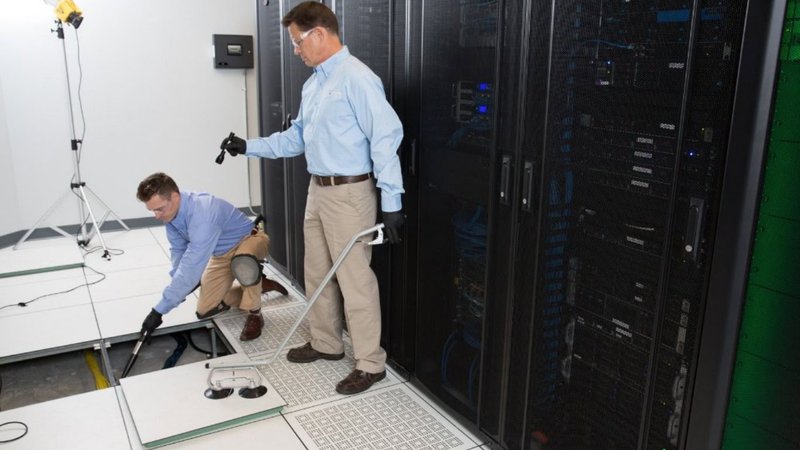
Next, the crew sets the pedestal layout. Working around utilities and structural elements flagged in the site survey, they place pedestals to hold the grid as tight as possible while clearing every conflict. Adjustments happen at this stage, before tiles arrive.
Stringers go across the pedestal tops to form the structural grid. In zones where obstructions make a full stringer grid impossible, the crew uses alternative support methods to keep tile stability and load continuity intact.
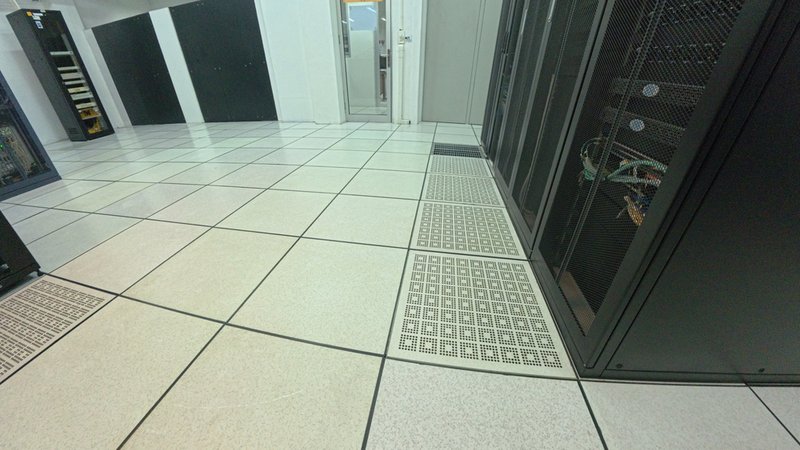
Tile placement follows. Vented tiles go in front of racks. Solid tiles fill non-airflow zones. Tiles with cable cut-outs land at cable entry points.
Floor tuning closes the sequence. Every access floor system needs leveling and alignment after the initial lay. Tiles shift during installation and pedestals settle as weight comes on. Tuning corrects these variances before equipment goes on top. Floor tuning after a retrofit also catches any pedestals that shifted during installation, which happens more often in occupied buildings where vibration from adjacent operations affects adhesive cure.
Live Equipment: When the Building Is Already Occupied
Some retrofit projects happen in spaces that are still running. A server room expands into an adjacent area. A wing converts to data center use while the rest of the building stays live. In these cases, installation has to happen without taking systems down.
SET3's AirWolfX relocation service lifts active server rows with no power-down required. Live racks move out of the work zone, the floor goes in underneath, and the racks return, all without stopping operations. For facilities where downtime carries direct financial cost, this converts what would otherwise be a planned outage into a standard construction sequence.
Post-Installation Validation
Every access floor installation in an existing building should close with validation. Particle counts confirm that construction debris doesn't remain in the environment. Airflow testing checks that perforated tiles deliver the right volume and pressure to cold aisles. Level checks confirm that tuning held and tiles sit flush across the full area.
SET3 follows ASHRAE TC 9.9 standards for all post-installation environmental validation, ensuring that certified documentation meets the requirements of regulated, government, and enterprise environments. SET3's environmental testing services cover all of these steps and produce the certified records that facilities need before commissioning.
To discuss an upcoming retrofit or conversion project, reach out to the SET3 team to learn more or place an order.